Difference between revisions of "Synthesis Doctor Raid Guide for Tarisland"
| (2 intermediate revisions by the same user not shown) | |||
| Line 3: | Line 3: | ||
|description=Detailed walkthrough Synthesis Doctor Raid Guide for Tarisland. | |description=Detailed walkthrough Synthesis Doctor Raid Guide for Tarisland. | ||
}} | }} | ||
| − | + | ==Phase 1== | |
| − | + | Before the start of the fight, players will need to take specific colored vials based on their role. | |
| − | + | * '''Red''' = DPS | |
| + | * '''Green''' = Healer | ||
| + | * '''Blue''' = Tanks | ||
| + | |||
| + | [[File:Vials.jpg|700px|alt=Screenshot of Vials|class=img-fluid]] | ||
| + | |||
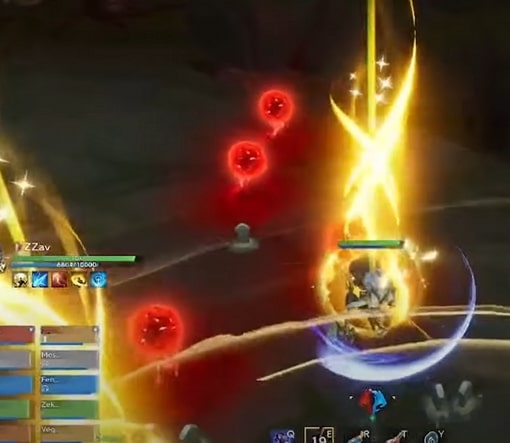
| + | At the start of the fight, the boss will drop red orbs around the map. DPS that selected the red vials will need to pick them up ASAP. If you do not pick them up in time, they will explode causing raid-wide damage. | ||
| + | |||
| + | If you do not have the red vial and aborb the red orbs = Instant death. | ||
| + | |||
| + | [[File:Red Orbs.jpg|alt=Screenshot of Red Orbs|class=img-fluid]] | ||
| + | |||
| + | |||
| + | ===Slimes=== | ||
| + | Boss will summon 2 Slimes that will pursue your healers (Green Vial). If the slimes reach the healers, it will instant kill them. DPS need to swap to slimes immediately and burn them. (Tip - Healers stay max range boss from boss to give you as much distance) | ||
| + | |||
| + | [[File:Slimes.jpg|alt=Screenshot of Slimes|class=img-fluid]] | ||
| + | |||
| + | |||
| + | ===Blue Orbs=== | ||
| + | Boss will spawn 4 Blue Orbs that will pulse AoE Damage and get bigger overtime. The Tanks (Blue Vial) need to run over them ASAP. | ||
| + | |||
| + | [[File:Blue Orbs.jpg|alt=Screenshot of Blue Orbs|class=img-fluid]] | ||
| + | |||
| + | |||
| + | ===Toxin Overload=== | ||
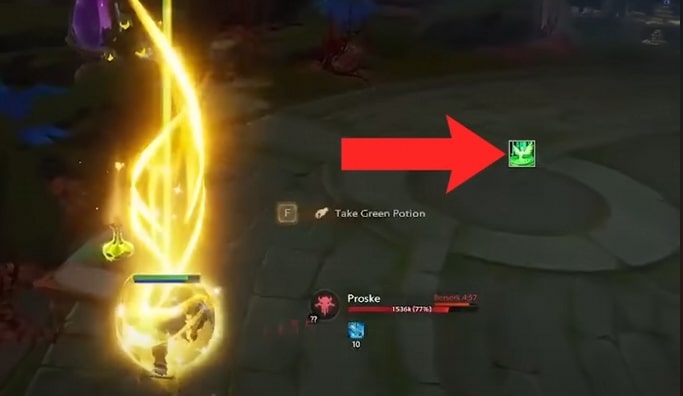
| + | Selects 1 random player and puts a debuff removing their colored vial. The player needs to drink the correct order of colored vials. (Indicated in red arrow). Doing it correctly provides a Dmg and healing buff, failing will lead to death. | ||
| + | |||
| + | [[File:Toxin Overload.jpg|alt=Screenshot of Toxin Overload|class=img-fluid]] | ||
| + | |||
| + | |||
| + | ===Mixed Toxin === | ||
| + | Places a damage over time on 2nd on threat. Pop defensive CDs/Heavy heals. | ||
| + | |||
| + | |||
| + | ==Phase 2 - Begins at 50%== | ||
| + | ===Blue Orbs=== | ||
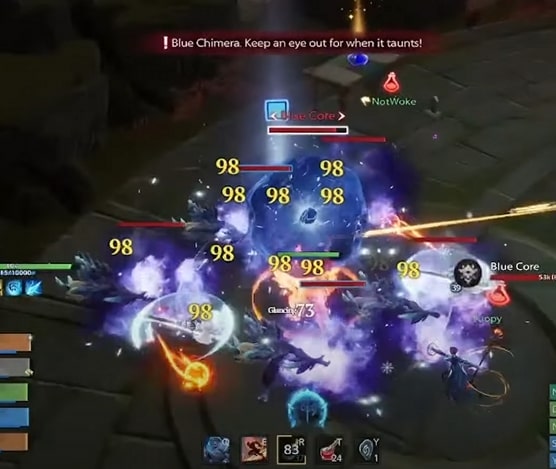
| + | Orbs now summon adds over time. DPS Swap to Orb/Adds. OT Needs to pick up adds, as they will run directly to healer. Main boss needs to be tanked away from orbs because he casts "Whirlwind" | ||
| + | |||
| + | [[File:Blue Orbs 2.jpg|alt=Screenshot of Blue Orbs|class=img-fluid]] | ||
| + | |||
| + | |||
| + | ===Red Chimera=== | ||
| + | Once red chimera is summoned (Right after Blue Orb), DPS Race. Need to kill before self-explode or raid-wipe. OT needs to go to main boss and get ready for tank swap everytime boss casts stomp on a tank. | ||
| + | |||
| + | [[File:Red Chimera.jpg|alt=Screenshot of Red Chimera|class=img-fluid]] | ||
| + | |||
| + | |||
| + | ===Green Chimera=== | ||
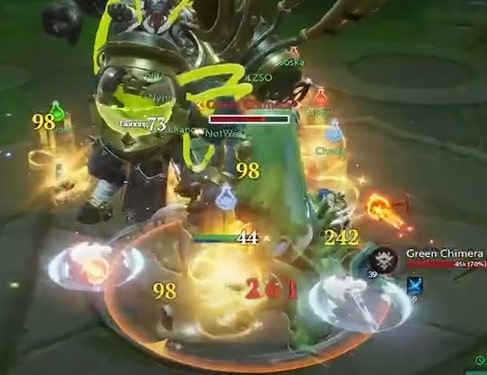
| + | Need to kill. As long as it's up, boss will gain a new ability "Rotating Venom" (Large AoE Dmg). Safe spot is in the boss hitbox. So ideally stack the boss on top of the chimera. | ||
| + | |||
| + | [[File:Green Chimera.jpg|alt=Screenshot of Green Chimera|class=img-fluid]] | ||
| + | |||
| + | |||
| + | ===Fusion Explosion=== | ||
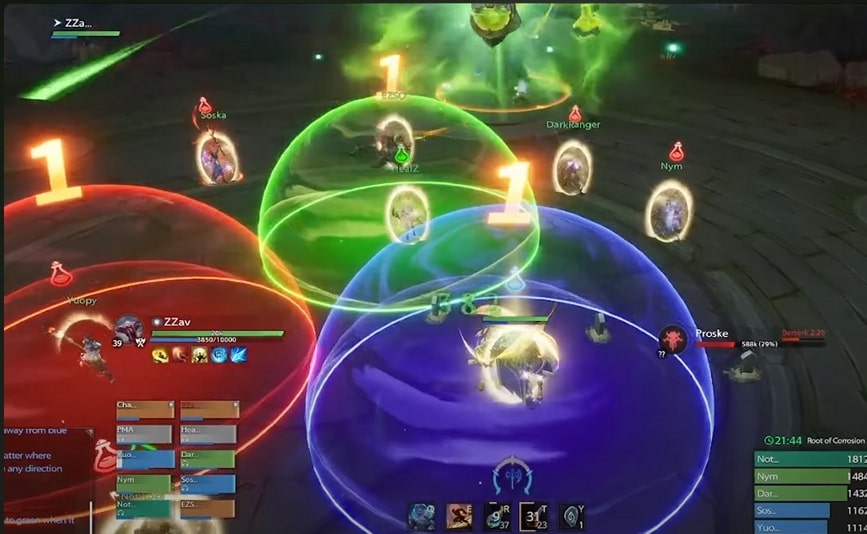
| + | Players must match the number of colored vials in the shield (Ex - 1 player with red vial in the red bubble/etc) | ||
| + | |||
| + | [[File:Fusion Explosion.jpg|alt=Screenshot of Fusion Explosion|class=img-fluid]] | ||
| + | |||
| + | Thanks to [https://discord.gg/dZpq8wVBPu Uncrowned (Discord)] for this guide. | ||
Latest revision as of 21:14, 5 November 2023
Phase 1[edit]
Before the start of the fight, players will need to take specific colored vials based on their role.
- Red = DPS
- Green = Healer
- Blue = Tanks
At the start of the fight, the boss will drop red orbs around the map. DPS that selected the red vials will need to pick them up ASAP. If you do not pick them up in time, they will explode causing raid-wide damage.
If you do not have the red vial and aborb the red orbs = Instant death.
Slimes[edit]
Boss will summon 2 Slimes that will pursue your healers (Green Vial). If the slimes reach the healers, it will instant kill them. DPS need to swap to slimes immediately and burn them. (Tip - Healers stay max range boss from boss to give you as much distance)
Blue Orbs[edit]
Boss will spawn 4 Blue Orbs that will pulse AoE Damage and get bigger overtime. The Tanks (Blue Vial) need to run over them ASAP.
Toxin Overload[edit]
Selects 1 random player and puts a debuff removing their colored vial. The player needs to drink the correct order of colored vials. (Indicated in red arrow). Doing it correctly provides a Dmg and healing buff, failing will lead to death.
Mixed Toxin[edit]
Places a damage over time on 2nd on threat. Pop defensive CDs/Heavy heals.
Phase 2 - Begins at 50%[edit]
Blue Orbs[edit]
Orbs now summon adds over time. DPS Swap to Orb/Adds. OT Needs to pick up adds, as they will run directly to healer. Main boss needs to be tanked away from orbs because he casts "Whirlwind"
Red Chimera[edit]
Once red chimera is summoned (Right after Blue Orb), DPS Race. Need to kill before self-explode or raid-wipe. OT needs to go to main boss and get ready for tank swap everytime boss casts stomp on a tank.
Green Chimera[edit]
Need to kill. As long as it's up, boss will gain a new ability "Rotating Venom" (Large AoE Dmg). Safe spot is in the boss hitbox. So ideally stack the boss on top of the chimera.
Fusion Explosion[edit]
Players must match the number of colored vials in the shield (Ex - 1 player with red vial in the red bubble/etc)
Thanks to Uncrowned (Discord) for this guide.
